

In this article Show
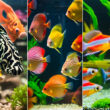
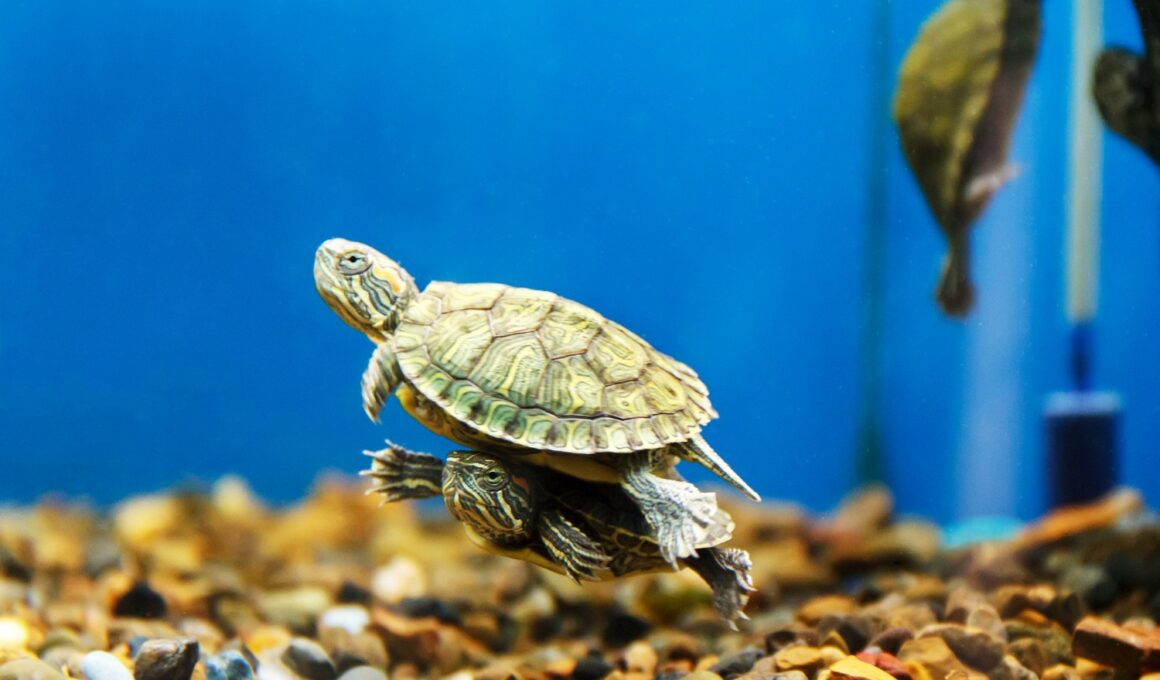
If you’re anything like me, your home aquarium has been a source of both pride and peace, watching those fins flutter gracefully through the water. Yet, there’s another water dweller that has captured the hearts of many – the turtle.
With their slow, deliberate movements and calm demeanor, turtles can be equally captivating and rewarding to care for as any fish.
Caring for a turtle, however, is not just about filling a tank with water and watching them swim. Much like our fishy friends, turtles have specific needs and nuances that, when met, can ensure they lead a healthy and fulfilling life.
Whether you’re a seasoned aquarium pro or just dipping your toes into the world of turtle care, I’m here to guide you through the ins and outs of providing the best environment for your shelled companion.

Turtle Species Overview
Navigating the diverse world of turtles can initially seem daunting. With various species available, each with its unique characteristics and requirements, it’s crucial to be acquainted with the basics. Let’s shed some light on the most popular turtle species you might encounter or consider for your home aquarium:
1. Red-Eared Slider
- Appearance: Recognizable by the small red stripe behind each ear and a greenish shell with yellow streaks.
- Size: Grows up to 12 inches long.
- Habitat: Prefers freshwater environments like ponds, streams, and lakes.
- Care Notes: Among the most popular pet turtles, they require spacious tanks, UVB lighting, and a varied diet.
2. Painted Turtle
- Appearance: Stunning, with a dark shell adorned by red and yellow markings along the edge.
- Size: Ranges between 4 to 10 inches, depending on the subspecies.
- Habitat: Found in calm, freshwater bodies.
- Care Notes: Energetic swimmers, they need ample swimming space and sunlit or UVB-lit basking areas.
3. Box Turtle
- Appearance: A dome-shaped shell that’s typically brown with vibrant patterns.
- Size: Grows up to 4 to 8 inches long.
- Habitat: Terrestrial, often found in woodland areas, grasslands, and marshy grounds.
- Care Notes: Contrary to popular belief, they are not fully aquatic. They require a land-based habitat with a shallow water source for soaking.
4. Common Musk Turtle
- Appearance: Small, with a grayish-brown shell and two light stripes on each side of its face.
- Size: Up to 5 inches.
- Habitat: Slow-moving freshwater environments.
- Care Notes: Often called “stinkpots” because of the musky odor they release when threatened. Needs a mix of land and water in their tank setup.
5. Russian Tortoise
- Appearance: Brownish or olive-colored shell.
- Size: 8-10 inches.
- Habitat: Dry environments, such as deserts and grasslands.
- Care Notes: Not a true turtle, this tortoise is land-dwelling and requires a spacious terrestrial habitat with a burrowing space.
Tank Setup & Environment
Diving into the realm of turtle care, one quickly realizes that the tank setup isn’t just about aesthetics; it’s about mimicking the turtle’s natural habitat as closely as possible.
A proper environment promotes health, longevity, and behavior typical of the species. Let’s explore the fundamental components of setting up an optimal turtle tank:
1. Tank Size
A common rule of thumb is 10 gallons of tank space for every inch of turtle. So, a turtle that grows up to 5 inches will ideally need a 50-gallon tank.
Remember, bigger is generally better, as it allows more swimming and exploration room. Turtles grow, and often faster than you’d expect. It’s wise to account for their adult size when setting up a tank.

2. Water Quality & Filtration
- The Lifeline: Clean water is imperative for a turtle’s health. Murky water can lead to skin and shell infections.
- Filtration Systems: Canister filters are popular as they efficiently handle both mechanical and biological filtration. Ensure the filter can handle the tank’s capacity.
- Water Change: Regularly change 25-50% of the tank water, typically once a week, to remove waste and contaminants.
3. Temperature & Lighting
- Water Temperature: Depending on the species, most turtles thrive in water temperatures between 75°F to 80°F. A submersible aquarium heater can help maintain this.
- Basking Area Temperature: Turtles need a warm spot to bask and regulate their body temperature. A basking area should be around 85°F to 90°F.
- UVB Lighting: Essential for turtles to metabolize calcium and prevent shell deformities. Ensure the UVB light covers the basking area and is replaced every 6-12 months.
4. Substrate & Decorations
- Safe Substrate: Smooth river rocks, fine-gravel, or sand can be used. Avoid large gravel as turtles might ingest them.
- Decor: Natural rocks and driftwood can provide hiding spots and enrich the environment. Ensure they don’t have sharp edges.
- Aquatic Plants: While they add to the natural look, keep in mind turtles might snack on them! Hardy plants like Anubias or Java Fern might fare better.
5. Land & Basking Area
Turtles need a space to dry off and bask. This can be achieved using floating platforms or stacking smooth rocks. Ensure the basking area is easily accessible for the turtle to climb onto.
Turtle Diet & Nutrition
Just as with any pet, understanding and providing the proper diet is pivotal to the health and longevity of your turtle. They aren’t simply content with a sprinkle of food now and then. These creatures require a varied and balanced diet to ensure they get all the necessary nutrients.
Most common pet turtles are omnivores, consuming both plant and animal matter. The ratio of plant to animal-based foods varies with species and age. Young turtles tend to be more carnivorous, while adults might lean towards herbivory.
Calcium and Vitamin D3 are crucial for shell and bone health. Providing UVB lighting and calcium-rich foods ensures turtles get what they need.
1. Commercial Turtle Pellets
These are formulated to provide a balanced diet and should make up a significant part of your turtle’s diet, though not the entirety. Opt for high-quality pellets from reputable brands. Check the ingredients to ensure they’re wholesome.
2. Fresh Foods
- Proteins: Live or frozen foods like earthworms, crickets, mealworms, and even small fish can be offered. They provide essential amino acids and are often relished by turtles.
- Vegetables: Leafy greens such as romaine lettuce, dandelion leaves, and mustard greens are excellent. Avoid iceberg lettuce, as it’s nutritionally void.
- Fruits: In moderation, fruits like melon, strawberries, and bananas can be given. They should be considered treats rather than staples.

3. Vitamins and Supplements
- Calcium: If not receiving enough from their diet, calcium supplements can be sprinkled on their food. Cuttlebones, often used for birds, can also be placed in the tank as a calcium source.
- Multivitamins: Though not always necessary with a balanced diet, they can be beneficial if you’re unsure about nutritional gaps.
4. Feeding Schedules & Portions
- Young Turtles: Generally require daily feeding, as they’re growing rapidly.
- Adult Turtles: Depending on the species, 3-4 times a week may suffice.
- Portion Size: A useful gauge is to provide food that’s roughly the size of the turtle’s head and neck combined.
5. Hydration
Even though they live in water, ensure that your turtle can easily drink clean water. This is usually not a concern in well-maintained tanks.
Lifespan & Health
Turtles, like many reptiles, are known for their relatively long lifespans, making them a commitment that spans decades. Proper care, starting from diet to habitat, plays a decisive role in how long and how well your turtle lives. Let’s explore the intricate dance between a turtle’s lifespan and its health:
1. General Lifespan
- Pet Turtles: On average, pet turtles that are well taken care of can live anywhere from 20 to 50 years, with some species reaching even more advanced ages. For instance:
- Red-Eared Sliders: 20-30 years
- Painted Turtles: 25-50 years
- Box Turtles: 30-40 years, with some reaching over 50.
- In The Wild vs. In Captivity: While some turtles can live longer in the wild due to their expansive natural environment, others might have shorter lifespans due to predation, pollution, and habitat destruction. In captivity, with proper care, threats are minimized, but space is limited.
2. Common Health Concerns
- Shell Problems: Issues like shell rot and pyramiding can arise from poor diet, inadequate UVB exposure, or dirty water.
- Respiratory Infections: Symptoms include wheezing, lethargy, and mucus discharge. Often caused by inadequate temperature regulation.
- Eye Issues: Swollen or closed eyes can be indicative of a Vitamin A deficiency or poor water quality.
- Digestive Problems: Impaction or constipation can arise from ingestion of substrate or overfeeding.
3. Signs of a Healthy Turtle
- Active Behavior: A lively demeanor, active swimming, and regular basking are good signs.
- Clear Eyes: Eyes should be bright and free from discharge.
- Solid Shell: The shell should be firm without soft spots or discolorations.
- Appetite: Regular eating habits without sudden changes in appetite.
4. Regular Check-Ups
Just as with other pets, routine check-ups with a vet specializing in reptiles can help detect and address issues early. Daily observation can help you notice subtle changes in behavior or appearance, indicating potential problems.
5. Preventative Care
If introducing a new turtle to a tank, ensure it’s quarantined first to prevent potential disease spread. Regular tank cleaning and water changes minimize the risk of infections and diseases.
Interaction And Handling
While turtles might not be the typical cuddly pets that purr or wag their tails, they can indeed form bonds with their caretakers and recognize those who interact with them frequently.
However, interacting with a turtle requires a particular set of guidelines, both for the safety of the handler and the well-being of the turtle. Let’s discuss the nuances of turtle interaction and handling:
1. Understanding Turtle Behavior
Turtles are not naturally inclined to being held. In the wild, a grasp from above often signifies a predator. Recognize this instinct and approach them gently. If your turtle hides, hisses, or retreats into its shell frequently, it might be feeling stressed. Frequent handling can exacerbate this, so limit handling to when it’s necessary.
2. Handling Techniques
- Gentle Grasp: When you must pick up your turtle, use a firm yet gentle hold, grasping both sides of its shell between its front and back legs.
- Steady Support: Always support the turtle’s underside. This provides security and prevents potential injury from flailing.
- Low Height: Keep your turtle at a low height when handling. This minimizes injury risk if it were to wriggle free.
- Short Duration: Limit the duration of handling. The less stress for the turtle, the better.

3. Safety Precautions
Always wash your hands thoroughly with soap after handling your turtle. Turtles can carry Salmonella, which can be transferred to humans. Avoid touching your face, especially your mouth, after handling a turtle, and certainly before washing hands. Also, never handle turtles in areas where food is prepared.
4. Bonding and Interaction
- Feeding Time: Many turtles begin to recognize their caretakers during feeding times. This can be a great bonding moment without physical handling.
- Tank Exploration: Instead of taking the turtle out frequently, interact with it inside its tank. Using a soft tool or toy to engage its curiosity can be enriching for the turtle.
- Voice Recognition: Talking to your turtle softly can also be a way of interaction. Over time, many turtles respond to their caretaker’s voice.
5. Children & Turtles
Always supervise children when they’re around or wish to handle turtles. Teach them the proper handling technique and stress the importance of handwashing. Educate children on the turtle’s sensitivity and the necessity to treat them gently.
Breeding & Hatchlings
Breeding turtles and witnessing the emergence of hatchlings is a profound experience that deepens the bond between caretakers and their shelled companions. It provides a firsthand look at the circle of life, right in your own home or backyard.
But breeding turtles isn’t just about pairing males and females; it requires preparation, knowledge, and dedication. Let’s dive into the essentials:
1. Pre-breeding Considerations
- Research Your Species: Different turtle species have unique breeding requirements and behaviors. Understand these before embarking on the breeding journey.
- Health Check: Ensure both male and female turtles are healthy and of optimal breeding age. This increases the chances of successful breeding and healthy offspring.
- Dietary Boost: Prior to breeding, enhancing the diet of your turtles with additional vitamins and calcium can aid in egg production.
2. Breeding Process
- Mating Behavior: Males often have courtship behaviors, which may include fluttering their front claws in front of the female’s face or circling her.
- Mating: Once the female is receptive, the male will mount her shell from behind. This process can take a few minutes to several hours.
- Post-mating: After mating, the female will begin searching for suitable nesting sites. This is a crucial time, and disturbances should be minimized.
3. Nesting & Egg Laying
- Nesting Site: Females need a suitable place to lay eggs, typically a spot with soft, moist soil where they can dig a nest. The depth and location depend on the species.
- Egg Depositing: The female lays her eggs in the nest, covers them with soil, and then leaves. Depending on the species, a clutch can range from 2 to 20 or more eggs.
4. Incubation
- Natural vs. Artificial: While you can allow nature to take its course, many breeders opt for artificial incubation to maximize hatchling survival rates.
- Incubation Conditions: A steady temperature (usually between 77°F to 86°F) and humidity are required. The exact temperature can determine the sex of some species, with warmer temperatures producing females and cooler ones producing males.
- Incubation Duration: Typically ranges from 45 to 90 days, depending on species and conditions.
5. Hatchling Care
- Initial Phase: Once hatched, baby turtles might remain in the nest for a few days, absorbing the remaining yolk sac. Disturbance should be minimized during this period.
- Diet: Start with small, protein-rich foods like pinhead crickets, brine shrimp, and specially formulated turtle pellets.
- Tank Setup: Hatchlings can be kept in smaller tanks initially but with clean water, a basking area, and UVB lighting. A shallower water depth is also preferable.
- Handling: Minimize handling during the early days to reduce stress.
Potential Challenges
Not all eggs may be fertile. Infertile eggs might mold or collapse. If breeding outdoors, be aware of potential predators like birds, raccoons, and others that might prey on eggs or hatchlings.
Conclusion
Embarking on the journey of turtle care is a commitment filled with learning, challenges, and immeasurable rewards. From setting up the perfect habitat to witnessing the wonder of new life through breeding, each step offers a chance to connect deeply with these incredible creatures.
By prioritizing their well-being, understanding their unique needs, and nurturing the bond you share, you’re not just providing a home for a turtle — you’re experiencing a fascinating slice of the natural world.