
In this article Show
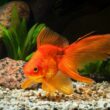
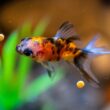
Whether you will bring a new fish and introduce them into your tank. It seems simple but acclimate new fish to the tank will be very stressful for them. Specifically, when you bought the fish online most of the time your fish will be shipped to you.
That’s saying it’s reaching to be in the shipping bag longer than fish you buy from your nearby pet shop and bring at home. It’s similarly significant to understand that the acclimation process isn’t actually a large deal.
Always remember that you must have to look outside of the acclimation process before something gets wrong. There are a lot of various ways to acclimate new fish to the tank as well. From the floating bag to the drip acclimation method, it completely depends on your condition.
Though some blogs will scare you by rendering it looks like rocket science. We also know there is perhaps a possibility you’ll lose a few fish but all around most of them must survive.
We’ll discuss the two most effective acclimation methods in this article. Most importantly the issue is staying alive with your new fish. We’ll gradually guide everything about the proper way to adapt fish into the tank.
Most Effective Fish Acclimation Methods
What’s essential to point out though, is that no acclimation method is wrong in any case certainly.
However, it’s a matter of discussion to ensure which acclimation process is the best and proper for you.
Some procedures are simply more suitable than others; also depending on the condition. So, let’s go through the two most effective fish acclimation methods separately.
Acclimating Fish With The Drip Method
This is one of the most effective fish acclimation methods. Many aquarists mostly choose this because they expect to acclimate fish slowly. In this manner, you won’t induce useless stress on your fish.
Firstly, you will have to need a drip acclimation kit with the aim of acclimating in addition to the drip method. Normally, this kit will not cost you more and has flexible tubing with some attached parts. In fact, if you’re completely creative you can simply and shortly self-build your drip acclimation kit.
Six Easiest Drip Acclimation Steps
When it comes to acclimating a new fish into the aquarium, there are six easy ways to go about it and they include;

Step 1: Shipping Bag Floating Into Aquarium
Once you’ve accumulated all supplies, initially you have to float the fish (inside the shipping bag) in your aquarium for at least half an hour. Fully dig this plastic bag into the tank later than you compel confidently it’s intact.
Wherever your plastic bag isn’t sufficient to carry out fish or anyhow your bag is split or damaged, no need to worry about it. You can use an additional appropriate plastic bag with the provision that is airtight and will float in your tank.
This floating process known as temperature acclimation assures your fish doesn’t die due to thermal shock. Anyway, find out the appropriate temperature of your fish before putting them into the aquarium. So that the condition is not too cold or warm for these fish.
On the occasion that your fish tank does get too warm, especially in summer, you can consider using a Chiller on the condition that your tank does provide too warm, particularly in summer. You can also use an aquarium heater for too many cold conditions.
Step 2: Barely Fill the Bucket Under Halfway With Aquarium Water
Fill a 5-gallon bucket with fresh aquarium water at the bottom half. You can practically fill the bucket anyhow your wish. Although most people will use an appropriate plastic container.
However, it’s not really essential but you can adjust your fish to the water temperature of the bucket before the next step.
Step 3: Transfer Fish Into The Bucket
Currently, it’s the period to put up your fish out from the shipping bag. Lift the bag lightly and spread the content containing the fish through to the bucket. When you pour the content inside the bucket, make sure that your fish is fully dipped. Again, make sure there is sufficient water in the container for the fish.
Step 4: Siphoning
You have to place your siphoning tube throughout the kit alongside one end in your aquarium to the bottom of the bucket. Optimally, you expect a few drip drop rates per second.
You can attach loose knots in the tubing to regulate the air and water flow. When the water will not flow automatically it’s better to start the flow by slowly sucking on the tube end nearby to your bucket. When the tubing is suitably set put the procedure to carry out until your bucket water doubles.
Step 5: Discard Half The Water
Stop the siphoning when the water in the bucket doubles. Also, remove half of the water in your bucket. You may use any cup that assures that you don’t quit your fish in the drain. One half of the bucket is full, repeat the siphoning until the water in the bucket double too. As similar, you pretty performed the primary time.
Step 6: Transfer Fish Into the Aquarium
Now, time to transfer the fish into the main aquarium. Usually, this aquarium should be obtained to acclimate the fish.
On the condition that you have multiple fish tanks, particular ones will have their individual ecosystem, so attempt not to combine with the content. Similarly, clams types of freshwater species don’t do satisfactorily when exposed to air. So, put up with additional care while transferring them into the aquarium.
Acclimating Fish With The Floating Method: Six Simple Steps
The floating method is excellent for starting up aquarists or while acclimating to water chemistry. It’s a very simple and straightforward acclimation method. Still, this is not very suitable for many reef tank occupants.
Because they are complicated ecosystems with fish variety that need very particular acclimation. While your fish is a freshwater species that was purchased online and transported to you it could be the nicer option.
Step 1: Switch Off Your Aquarium Lights
Sharp light gives unwanted stress to your fish, especially with harsh exposure. Due to that reason before off-loading your carrier box, close down your aquarium lights as well as dim all sharp lights inside the room.
Decreasing the light is also essential when floating your fish inside an aquarium alongside antagonistic species. Definitely, you can’t completely close down the lights while working inside any position of the room.
As a consequence, consider dimmable lights in order to achieve such a condition in case you don’t have them previously.
Step 2: Float Sealed Bag Into Aquarium
Floating the bag follows the same basis during any acclimation method. The temperature acclimation is not only protected your fish from thermal shock but also sustains a great layer of dissolved oxygen. Generally, the temperature acclimation method requires less than thirty minutes.
Step 3: Unclosed And Rise The Upper Boundary of The Bag
Roll the top edge after opening the bag to build an air pocket afterward floating the bag. Take time to wipe out the metal clip or rubber band dissimilar to a coral bag that you simply cut open.
Opening the bag is very important and carefully cause the following step will need the bag to be less or more intact. It also works for the bag to stay sturdy sufficiently and not spill on the fish.
Be sure that your bag will float on the water’s surface. You can borrow a bowl or container for heavy parts that will drown the bag.

Step 4: Add Water On The Shipping Bag
Begin bringing up tank water within the bag after some moments of floating the bag. Start in addition to half a cup of water and run the step up until the shipping bag is filled.
This will increase aid balance the temperature and neutralize the chemical variations within the water as well. When your bag is flowing over too largely, put an algae magnet in the bag to protect it from the wall of the aquarium.
Step 5: Remove Half The Water from The Bag
Lift the bag when it is full from the aquarium and remove half the water. Furthermore, float the bag in the aquarium and repeat the filling steps the next time.
Step 6: Transfer Fish Into Aquarium
Right now is the moment to get going your fish within the aquarium. It’s recommended that don’t get going bag water within your system.
Therefore, smoothly leave your fish within the aquarium coming out of the shipping bag by using your hands or a Net. After that discard the filled shipping bag out of the aquarium and remove the water.
Freshwater Fish Vs Saltwater Fish Acclimate
The objective of acclimation is straightforward, the water that a fish packaged or arises from has several temperatures, pH, and other factors than your aquarium water.
Particularly, most new fish faces the risk of dying if the new environment temperature or pH isn’t appropriate for the fish.
Similarly, when approximately all acclimation methods will adjust new fish through to the aquarium temperature, limited pay concern to the pH. Many will just float the bag into the tank to balance the temperature and then release the fish, water, and the rest of the others inside their tanks.
Due to the fact that there is no common pH that correlates to all fish. Think of it as a choice. They need several conditions because they come from oceans, rivers, lakes, or even ponds such as different environments.
Usually, freshwater fish prefer a lower pH between 5.5 to 7.5 whereas saltwater fish desire better alkaline-like pH of 8.0. Make sure a water pH of 6.0 is sufficient enough for your freshwater aquarium.
On the other hand, saltwater fish aquarium pH is around in the range of 8.0 and upon. An adequate approach has to be to study the pH needed by your new fish cause many are soo sensitive. A variation even as few as 0.5 might give your fish into pH shock.
Acclimate Saltwater Fish
You can try any acclimation methods from the two to acclimate saltwater fish.
The floating accumulation is excellent for new aquarists or when you want to acclimate the usual ornamental fish. These are relatively conventional methods and the outcomes are comparable to those of drip acclimation.
The drip method is supposed more developed and is suited for shrimp, corals, sea stars types sensitive inhabitants. Also, you will require more supplies in comparison with
the floating method. Plus, you should suppose is trying a quarantine tank to keep up the new fish for 2-3 weeks.
Acclimate Shipped Fish
The shipped fish acclimating way is slightly different than the fish you purchase from your nearby pet shop. First, be sure your fish is alive and in good condition after you collect and open your bag.
Always remember that sellers will have a Live Arrival Guarantee only the maximum number of times. So, they can’t be liable for your fish acclimate way. After that, slowly float your fish in the aquarium. Also, acclimate the temperature of water in the bag of your fish tank for twenty to thirty minutes.
Wrapping Up
You must have to select the proper way to adapt fish into the tank. There are a lot of different ways to acclimate your new fish to the tank. The method you select for acclimating new fish to the tank will totally depend on you.