In this article Show
Keeping your fish tank neat and clean is of daily importance. For the sake of your beloved pet fish, you have to do it regularly. The most common place to get dirty is the gravel of the fish tank.
Using a vacuum is the easiest way to clean up the mess. But without a vacuum, it may make the work a bit harder.
In many fish tanks, polluted substrates are a vital source of low water quality. Gravel harbors crop residues, decaying plants, and fish wastes that are being caught between pebbles, making the water progressively acidic.
The gravel in an aquarium absorbs fish waste and food debris like a magnet, which makes a method of washing challenging. It might be a little hard at first, but you won’t find it too hard as soon as you hang it up.
So, if you want to clean your fish tank gravel with and without a vacuum, continue reading this article. We will be providing every important step you need to know. Let’s get started.
What is Fish Tank Gravel?
In your aquarium, at the bottom, the material that you use to hold up plants, fish tank equipment as well as the material that contain wastes from fish or food and become the heaven for many beneficial bacterias, is known as Fish Tank Gravel.
The gravel of the aquarium applies to the material on the tank floor. It is equally important for the esthetic attractiveness of the aquarium and can impact water chemicals, aquarium residents’ filtration, and well-being.
The correct substratum depends on the aquarium type, and the main feature is whether the aquarium is fresh or saltwater. Which medium you select for an aquarium, will contribute to your arrangement’s esthetic.
It will also enable you to have the kind of atmosphere for your fish in which beneficial bacteria evolve and expand.
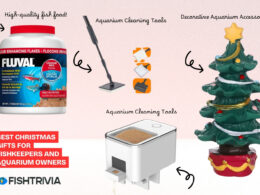
How To Clean Fish Tank Gravel With And Without Vacuum
Even if you want to clean your fish tank with a vacuum or without, here is how to;
Without Vacuum
1. Get The Fish Out
It is a must for any kind of cleaning. However, cleaning with a vacuum may not require getting the fish out. We will be discussing that later on.
Take a clean bucket or container consuming fresh water for your fish. Keep them there providing necessary water flow and air. Remember, you will have to keep them there for at least one and a half hours.
2. Unplug All The Accessories
You may not want to take the risk of getting an electrical shock, right? For that reason, you must unplug all the electrical accessories from the fish tank. These include a heater, cleaner, and air compressor. If you are creative enough to attach aquarium lighting, then you also have to unplug them.
3. Prepare a Tank
After placing your fish in another clean tank or container, you should take a cup and start scooping the gravel like you are scooping from the ground. If you angle your fish tank a bit, it will be a lot easier.
4. Clean up the gravel
With a plastic cup, sponge, or an old but clean towel, you can soak up the wastage from the bottom of the tank. After that keep the tank aside and let the gravel set. In that way, it will become easier for you to wash it away.
Using your hand in hold the tank and give the fish tank a good shower. Water force will wash away all the dirt and filth.
You have to make sure you are keeping some dirt left in the gravel, as it will be producing some beneficial bacteria which can also provide food to your fish.
5. Plug-In and Put The fish Back In
Now, set back the gravel as it was or in an updated way. Put back the aquarium plants and all the equipment as those were.
But you have to be very careful about putting back the fish in. Because the new water temperature will not be the same as before. So to do that, you will have to keep in check the temperature.
You will have to prepare the water with necessary nourishment then put the fish back. Keep them under observation for 24 hours for any kind of odd behavior.
6. Cleaning Gravel Algae

Algae in your fish tank gravel are common. With all those fish and food waste they get enough nutrition to grow. Cleaning them up may seem harmful to your fish tank.
They can reduce the level of oxygen by growing on a large scale and it is more harmful for your fish. You can easily pull them out with your hands or you can use a vacuum kit, target them and suck them.
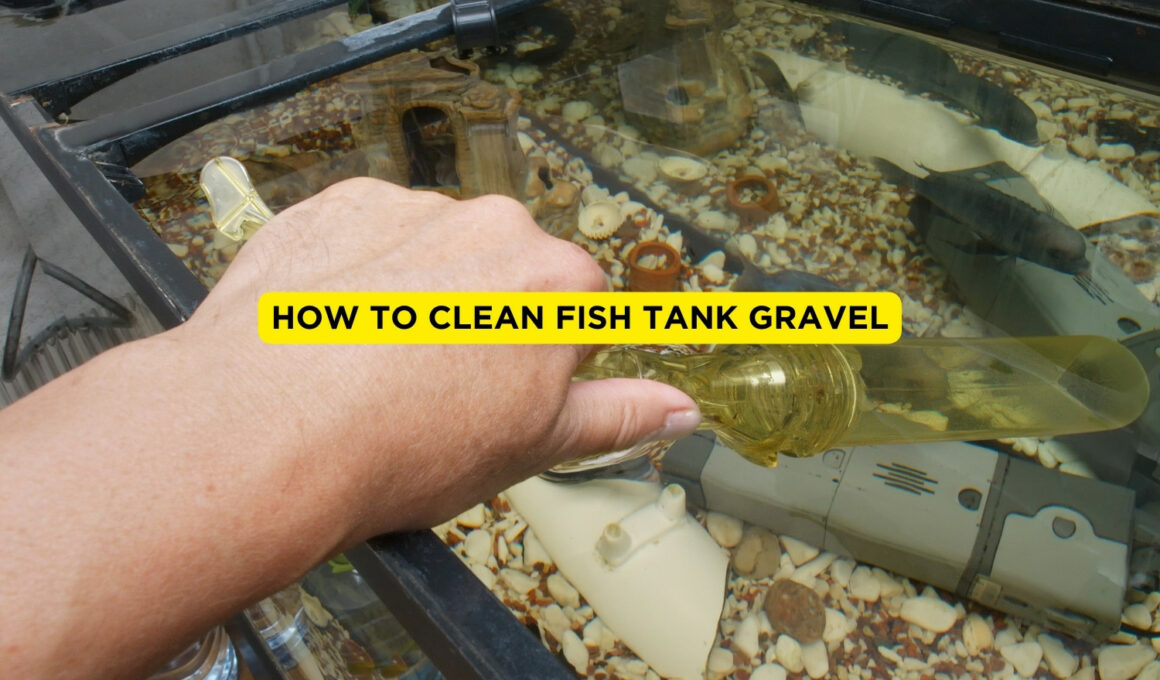
With A Vacuum
For vacuum aquarium gravel, a vacuum gravel cleaner is used. It uses gravity and hydrostatic pressure to pull pollutants from substrates and help to expel them from the exterior of the tank. You can work with it 100 times faster and smoother. We will be enlisting some awesome techniques;

1. Unplug & Submerge
Dissipate the air pump, furnace, filter, and tank decorations, and keep the plants and fish in the aquarium. The process should usually be reasonably smooth, so your fish should not get too stressed.
Get a kit for the cleaning of your aquarium gravel and an old bucket of water. Place the bucket underneath the level of the aquarium and start with your tank with the vacuum operation. Ensure that the siphon vacuum tube is fully in the reservoir.
2. Vacuum in Up-Down Motion
Shift the water tube of incremental travel upwards by 2 Until water begins draining in the bucket below 4 centimeters above the dirt. Pass the pipe on if the flow is formed
Complete the gravel field and search for completion of the bleak. Only switch the
vacuum to the gravel, to finish the tank, the substratum itself. The pipe is in a lot of bricks, but As the tube is raised, it should come down.

3. Alter the Vacuum
If the water volume fell by about 25-30%, then the tank is filled by about 75%, when in the tank, the vacuum tube can be lifted from the tank easily and drained by the tube.
The tube would be filled before approaching the target amount of water, drain the vacuum, and vacuum from the gravel before hitting the desired amount.
4. Plug-in Back
Restore all the components of your aquarium and make sure that the gravel is fairly clean, clear the cleaning area, and put the heater, filter, and air pumps back into the tank.
An Alternate Method
This approach is good if you have live plants because it will destroy the roots and finally kill the plants by removing them from the tank.
Next, like other lights, remove the fish from the tank. If possible, hold the living plants embedded in the gravel and drop them down on one side of the aquarium with the accompanying gravel.
Remove the gravel from the plants with your hand. Mix the gravel thoroughly enough that the trapped waste is suspended in the water between these items. Dip the silty water left in the tank from one-third to one-half next. The remainder of the water contains the good bacteria that your tank needs to repopulate.
DIY Method
This method of gravel purification only needs a few basic products. The cleaning of waste from the tank gravel is super special and efficient. In a small period, you can make it a huge victory, too.
Equipment
- Plastic bottle
- Rubber band
- Air tube with a spray pipe connected to it.
- Mesh bag
Take the bottle foundation forward. You need to keep the container tall, which is about 2 to 3 centimeters from the glass.
Pierce an opening in the bottle cover. The hole is meant to match the tubing that you have selected to use. Before drilling, it’d be clever to weigh and calculate it.
Feed the air tube into the gap. Push the bag along with the channel. With an elastic strip, stable. Place the mesh bag tightly on top of the bottle and secure it. Enable a little extra material to hang up to make sure it’s safe.
Insert it and begin cleaning the tank. You would not even need a bucket with this gravel cleaning process, as water will not drain away from the tank. You’ll also go down and up about 3 inches over the tank dirt, nevertheless, the same moves as you put your bottle in the wash. Take the gravel deeper for a more thorough cleansing.
It is an incredibly simple way to scrub the gravel without draining the water in the aquarium. You need not only to whip this useful tool in minutes, but you also need no panic about when the cleaning is finished about adding more stuff. Bear it in mind, and thank us whenever it comes in handy!
Some Important Considerations
It needs time and resources to clean the tank. And if you obey the instructions here, it will be quicker to do it, do not hope that it is all completed in a little while.
Taking no more than twice a month to clean the fish tank gravel unless the aquarium is overcrowded with fish, plants, etc. If you need to prepare for everything in the tank to be helped quickly, begin with one cleaning cycle and move on to the next.
It is clever to use water to purify the fish tank’s gravel rather than do something else. Do not damage fish or plants if you wish to use anything else.
Final Thoughts
A very important aspect of every fish aquarium is the fish tank gravel. Gravel is usually the place to collect fish waste, dead plants, waste food, and waste. Increasing nitrate can damage the fish’s health if you do not clean it regularly and correctly.
This form of the filter can operate in certain conditions, but if your gravel is very good you may block the filter and make it inefficient. If you’re in your tank of larger, heavier gravel, sure, it does work. Although the only way to do so is to scrub the gravel yourself.
Algae and other dangerous microorganisms may develop inside the fish if it is not regularly well-washed. This article addresses one of the quickest and simplest ways to purify aquarium gravel using various methods.
My tips for Gravel Vacuuming and cleaning sponge filters. Great if you’re new to the hobby or just want to learn some tips. You should watch this video below; enjoy!
Relevant Resources:
- Freshwater Fish for 10-Gallon Tank: Which are the Perfect?
- What Size is a 20-Gallon Fish Tank? (Dimensions) Best Fish
- Can Aquarium Plants Grow in Cold Water? What’s The Best Temperature